Click to view our Accessibility Statement or contact us with accessibility-related questions


Showing 1 of 380 conversations about:

Bflying
1105
Nov 24, 2017
bookmark_border
Bflying
1105
Nov 27, 2017
bookmark_border
RussBThank you. I was hoping for a really deep blue, but still looks ok.
TheGrouch
71
Nov 27, 2017
bookmark_border
BflyingPLEASE SIR, A TUTORIAL ON OUR BEAUTIFUL KNIFE COLORING !
Bflying
1105
Nov 27, 2017
bookmark_border
TheGrouchI think there are already more people on YouTube that explain it much better than I could. But short story, it is electrically adding patina to titanium. The color comes from light refraction through this patina. The color is dependent on the voltage applied. And the finish on the Ti can affect how that color looks. For instance, the clip on my ZT0850 in a picture above is the same voltage as used on my Crux. But the ZT clip had the satin bead blast finish left in place, and the Crux was sanded down and polished a bit.
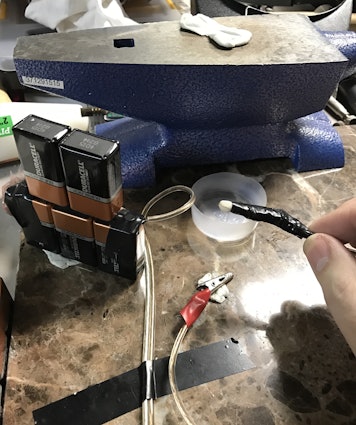
You can get set up like a pro, or do it on the cheap like I have done. The color chart below I use to estimate the shade you may expect with the voltage applied. I just daisy chain 9 volt batteries, and go in full 9 volt increments .... and use Coke for the activation acid. I'm told it's fairly non-toxic. 😂 I've seen others add dimmers or resistors to reach variable targets within the last 9 volt battery added.
So in YouTube, search "how to anodize titanium" and can also be more specific with "9 volt batteries". This process pretty much only works with titanium and niobium. Aluminum anodizing is a much different process. To be honest, I've really enjoyed learning something new, and seeing the end result with minor changes.
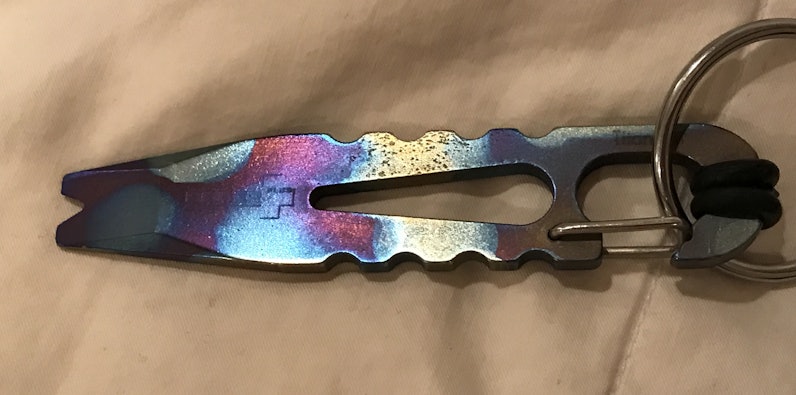
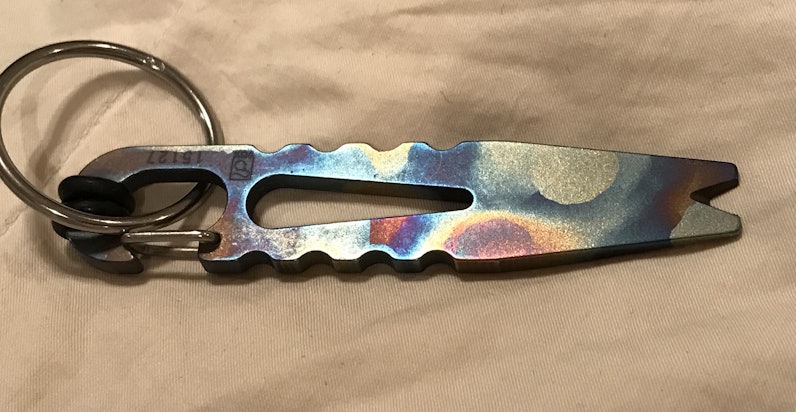
I hope I've sent you in the right direction. Oh, and for the splatter look, I used fingernail polish for a resist. And non-acitone polish remover. The process is additive in nature, so you could always change the color from what you get with 27 volts to 36 volts. But not the other way. Therefore, I could have done the first color a yellow shade at 81 volts. Then strip the polish and do the entire scale at 36 volts for a purple color where the polish was, while not affecting the yellow.
I'm happy to answer specific questions where possible, but please remember that I'm a complete novice. Only know enough about it to get myself in trouble. 😬😎🤠
My high tech "system".

Color estimator.
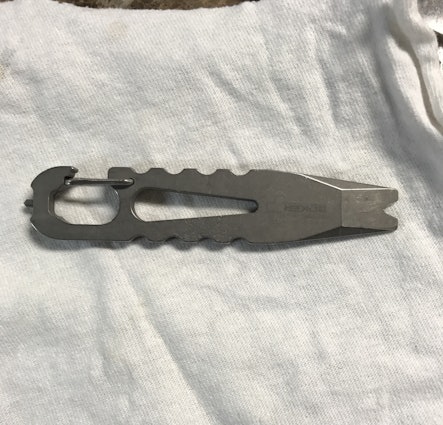
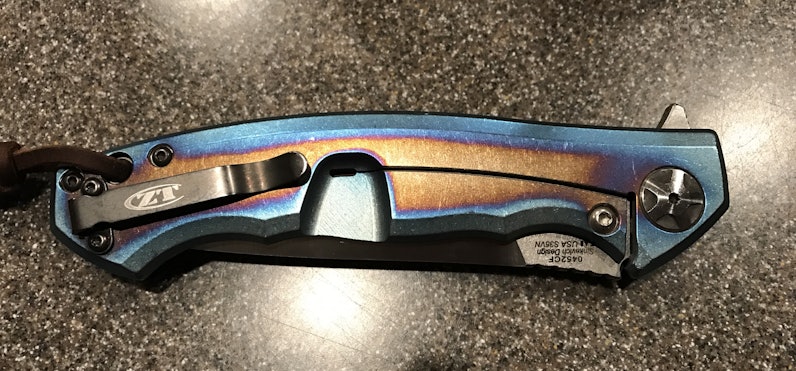
Here's a few more items I've done in the past. They were done with a "brush" application. So instead of dipping the entire item in the acid (Coke), I connect the positive side directly to the item, and clipped a qtip sized piece of cloth into the negative side. So the only part affected is what is wet and touching the cloth. Takes a considerable amount of time to do larger areas, but you have a little more creative control. On the ZT0452, I first did it with a bronze color everywhere, then took the voltage up a bit for the sides in purple. After some time, I decided that I didn't like the purple, added another battery and took most of the purple to blue. I figured that if I get tired of this look, I could always take the entire side to blue (or higher voltage).
You can get set up like a pro, or do it on the cheap like I have done. The color chart below I use to estimate the shade you may expect with the voltage applied. I just daisy chain 9 volt batteries, and go in full 9 volt increments .... and use Coke for the activation acid. I'm told it's fairly non-toxic. 😂 I've seen others add dimmers or resistors to reach variable targets within the last 9 volt battery added.
So in YouTube, search "how to anodize titanium" and can also be more specific with "9 volt batteries". This process pretty much only works with titanium and niobium. Aluminum anodizing is a much different process. To be honest, I've really enjoyed learning something new, and seeing the end result with minor changes.
I hope I've sent you in the right direction. Oh, and for the splatter look, I used fingernail polish for a resist. And non-acitone polish remover. The process is additive in nature, so you could always change the color from what you get with 27 volts to 36 volts. But not the other way. Therefore, I could have done the first color a yellow shade at 81 volts. Then strip the polish and do the entire scale at 36 volts for a purple color where the polish was, while not affecting the yellow.
I'm happy to answer specific questions where possible, but please remember that I'm a complete novice. Only know enough about it to get myself in trouble. 😬😎🤠
My high tech "system".
Color estimator.
Here's a few more items I've done in the past. They were done with a "brush" application. So instead of dipping the entire item in the acid (Coke), I connect the positive side directly to the item, and clipped a qtip sized piece of cloth into the negative side. So the only part affected is what is wet and touching the cloth. Takes a considerable amount of time to do larger areas, but you have a little more creative control. On the ZT0452, I first did it with a bronze color everywhere, then took the voltage up a bit for the sides in purple. After some time, I decided that I didn't like the purple, added another battery and took most of the purple to blue. I figured that if I get tired of this look, I could always take the entire side to blue (or higher voltage).
TheGrouch
71
Nov 27, 2017
bookmark_border
BflyingThank you for all he information, sir. I will attempt what you have instructed. Beautiful work and thank for being a selfless teacher.

Bflying
1105
Jan 21, 2018
bookmark_border
Lbd11Do it. It's rewarding to learn a new skill. Not to mention, make your knives custom, unique, and totally yours in personality. Also, it's pretty easy to strip off taking it back to raw Ti. Where you could leave it natural, or redo color in a different way.
One thing to keep in mind, is that the finish on the metal, whether Bead blasted, heavily sanded, Finely sanded, or highly polished, will all give a different visual when all hit with the exact same voltage at the same time. So some Trial and Error will most likely be part of the process. And may even become a FUN part of the process.
Have as many of the parts and supplies as possible on hand when you start. Like Whink Rust Remover. It allows you to start over if you don't like the first results. Also is used as an etchant to get better results.
maxbernstein
67
Oct 17, 2018
bookmark_border
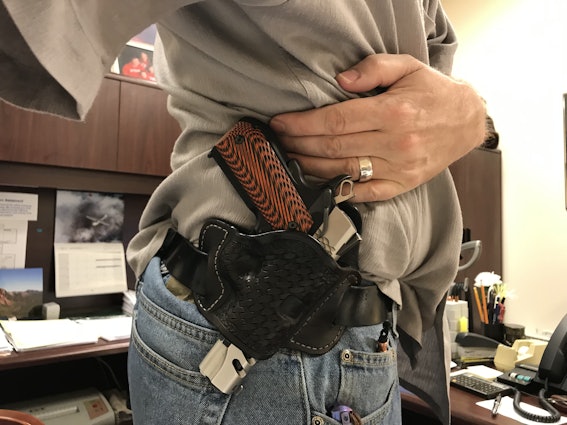
BflyingLove the two tone 1911 commander, makes for a great CC pistol since it's slim and all. If you don't mind me asking, which type of holster do you use most often? (I see I'm not the only one with the extended +1 mag baseplate)
Bflying
1105
Jan 11, 2019
bookmark_border
maxbernsteinSorry about the late reply. Must have missed the notice. Most of the time I use my own OWB. When I need IWB, I prefer CrossBreed.
maxbernstein
67
Jan 11, 2019
bookmark_border
BflyingI'm partial to Bravo Concealment IWB holsters, works great for my G33 gen 4 and the kydex mag holster is a nice combo. I wish my state supported open carry, but tucked and locked will have to do for now.
Bflying
1105
Jan 11, 2019
bookmark_border
maxbernsteinWhile open carry is plenty legal here, I seldom do. Being a lazy gray beard, I usually wear jeans and untucked Bahamas. It's how I get away with the comfy OWB. I only tucked the shirt for the pic.
Drop Refurbished
Like-new products you can trustDrop Rewards
Get $5 for every 500 points you earn! Learn more
Drop Keyboard Club
Become a member and expand your keycap collectionCollaborate With Us
For Brands & DesignersFollow Drop
So far, I have only had a little time with the Crux. As the Falcon has been in pocket since receiving. I like the size of the Crux better, as I prefer to carry slightly larger knives. But the Falcon seems to fit better in my hand. And especially if using g the forward choil. The afalcons ergo's are really good whether using three finger grip or four. However, the Crux feels a bit awkward, and even more so if choking up with the choil.
I'm also still pretty impressed with the tolerances. No matter how many times I take these apart, they still snap right back to perfect centering and nice blade deployment action without any special tweaking.
Am also glad there are some steps being taken on the clips. They are an obvious weak point that every single user will encounter if regular use is intended. I would estimate that only a small percentage of owners intend to use these on a daily basis. My Falcon clip is bending. And has lost much of its tension on my pocket. The Crux has not had enough time in pocket to know. Hopefully my one (so far) clip that is failing, will be covered under warranty when the 2.0 is released. If my Crux clip is still performing as needed, I will be happy to pay for it's replacement, and even an extra just in case.
With my Falcon having many hundreds of flips on it (still <100 on the Crux), the detent and flipping actions are approaching that of my ZT's. Not exact, but getting darn close.