
Mixshop Mini Kossel 3D Printer Kit

Print the Next Dimension
When Gutenberg made the first printing press, it took years for his technology to reach the hands of the masses. The first commercially available 2D printers were released centuries after the original’s inception, but fortunately for you, the wait for residential ready 3D printers wasn’t nearly as long. Delivering the parts necessary for assembling a 3D device all your own, the Kossel Kit has everything you need to start printing plastic today.
Breezy Build
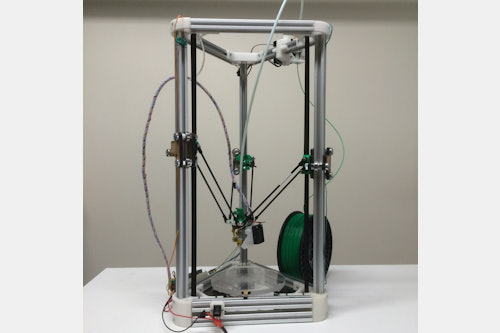
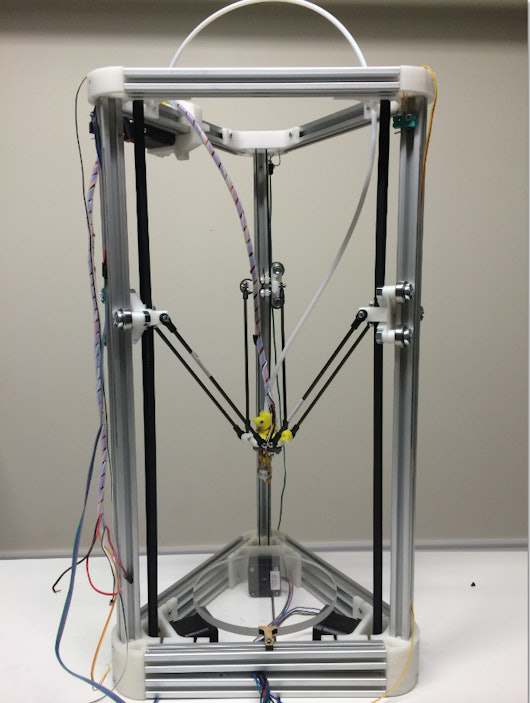
Building off the open source technology started by the self-replicating RepRap, the Kossel Kit comes with all of the primary parts you need, including a power supply and glass build platform. After constructing the frame with a few basic tools, simply hook up the electronics and you’re printing in no time. Though the part list is more complicated than a standard Canon, the easy to follow step-by-step instructions will get you there with time to spare. As all the parts are pre-cut and labeled, you won’t run the risk of mixing up what goes where.
Acrylic and Aluminum, Together at Last
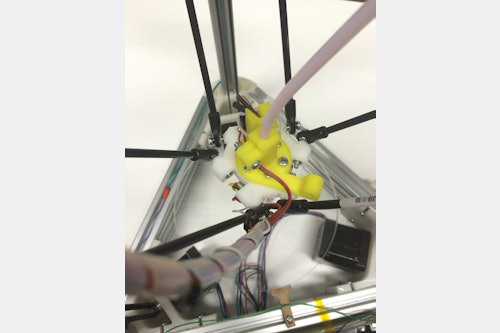
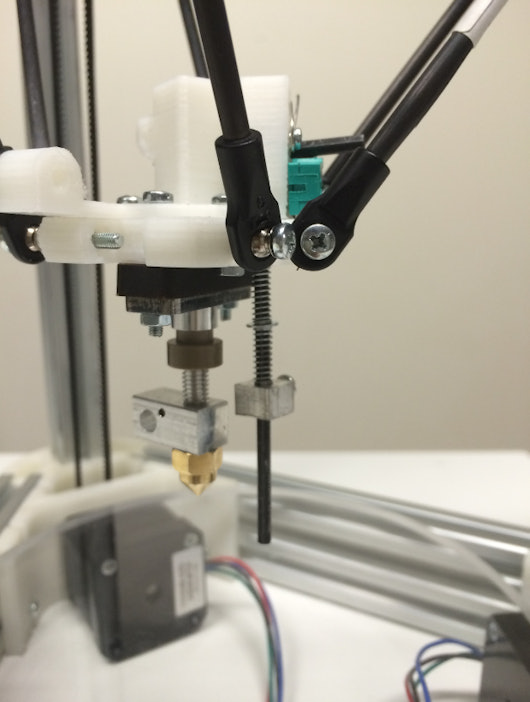
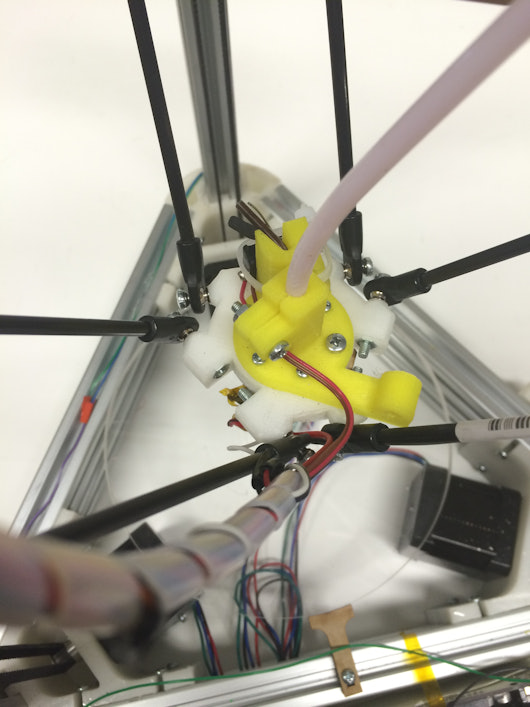
Once set up, the three stepper motors work in tandem to control the kinematically linked effector for maximum movement in the x, y, and z axis. Allowing faster and smoother printing, put out as many prototypes as your heart desires without wearing down the machine. It comes at a reasonable price too, thanks to the acrylic hardware, and the auto calibration makes navigation a breeze. Finished off with aluminum extrusions for durability and simple aesthetics, the Kossel Kit transforms your printing process in only a few hours.
Build Video
Included
Printed parts:
- 3x Frame Set (Top and Bottom)
- 3x Carriage Set (slider 1 – 2 and 3)
- 1x T Shaped Laser Cut Print bed Tabs
- 1x BI Edition Extruder (Tensioner, Extruder Part, Shaft, Tube Holder)
- 1x Fan Attachment(optional)
- Linear Motion:
- 10x 628Z Ball Bearing
- 3x 1200mm T2.5 discourteous belt
- 3x 623Z Ball Bearings
- 3x T2.5 Pulley (12 Teeth)
- 4x NEMA17 stepper motor
Frame:
- 3x 600mm OpenBeam (20mmx20mm)
- 9x 240mm OpenBeam (20mmx20mm)
- 1x Acrylic glass (170mm round)
- Diagonal Push Rods
- 12x Traxxas 5347 rod ends (M4 holes)
- 6x 180mm Carbon tube ID=4mm
Electronics:
- 3x microswitch
- 1x RAMPS 1.4 with Arduino
- 4x Stepper controller AD4988 for RAMPS
- 1x 12V 10A/6A power supply
- 1x Power cord only with 12V 10A (optional)
- 2x 12V 50x50mm fan
- 3x Zip Tie
- 1x 12V 40x40mm fan (optional)
- 1x Wiring Set (Ribbon wire 2m, Pin and Crimes, thick wire 2x 1.5m and 2x1m)
- 1x USB Cable
- Nuts & Bolts
- 6x M2x16 Screw
- 6x M2 nuts
- 3x M3x16 Screw
- 18x M8 Washer
- 60x M3x12 Screw
- 12x M3x 12 Hex Bolt (for 3 motors)
- 4x M3x6 Set Screw
- 45x M3 T-shape nuts
- 8+8 x M3x20 screw
- 8x M3x25 screw
- 30+5 x M3 nut
- 9x M8x25 Screw
- 9+9 x M8 nuts
- 2x M4x40 Screw
- 2x M4 Flat Washer
- 2x M4 Hex Nut
End Effector Set (Assembled)
- 1 x End Effector (Bottom and Top)
- 1 x M3 x85mm Allan key
- 2 x Pen springs
- 1 x Spring Locker (Plastic Parts)
- 1 XM3x 6 Set Screw / Screw
- 1x MIX Hotend Set
- 1x V Shape Safety Pin
- 35mm Tube (M 3.4 hole one way)
Hotend Set:
- 1x 3.3ohm Resistor
- 1x 100k Thermistor
- 1x Kapton tape 5mm of 10mm
- 800mm Tube with M3 holes (Top and End)
- EXTRUDER - BI Edition Extruder:
- 1x Hob
- 2 X 1/4" X 1/2" Compression Spring
Power supply Set:
- 1 x Switch (Plastic Part)
- 2 x M3x 25 Screw
- 2 x M3 T-shape nut
- 1 x Power switch
Shipping
Estimated ship date is June 11, 2014 PT.
Payment will be collected at checkout. After this product run ends, orders will be submitted to the vendor up front, making all orders final.

Ask the Community!