Click to view our Accessibility Statement or contact us with accessibility-related questions


How To Build A PC [Ongoing Discussion & Guide]

search
close
Sort by: Newest
keyboard_arrow_downShadowBobX
1
Mar 12, 2019
Once it took me almost 3 hours to realize that my new build wouldn’t boot bc I hadn’t plugged the computer into the outlet... still didn’t work even when I did lol, but it got me closer. Then it was just a matter of reseating my ram.
Clem1982
0
Mar 13, 2019
ShadowBobXLucky you that was a simple solution. It happens to the best of us I believe, just take note on your next build to perform a test boot with the motherboard+cpu+ram outside of the chassis. This actually saved me quite a few times.
Then again, I have that as a habit as I mostly build with second-hand parts mixed with the new ones.
ShadowBobXLol, I've certainly made simple mistakes like this as well too.
RubyDreamer
12
Mar 12, 2019
Its a shame we cant have stores dedicated to helping people build, and upgrade, their own PC.
Just imagine, if you could just order it, get what you need, delivered to the store (with no worries about damage/theft), have someone nearby to help and answer questions, and get exactly what you need, for a good price. And for the less techy, have a tech there to show you whats being done, and to make sure you know how to care for your new machine. And best of all, when upgrading, they could offer to buy back any usable tech (for a reasonable price) which could make upgrades even cheaper, while providing low cost "refurbished" parts for even lower cost low end building, as well as better recycling of parts that cant be re-used. And no worries about having to get the right setup for safe upgrades, as they would have all the techy stuff, ready to help you upgrade!
The store could be VERY small, and run almost entirely out of storage, as the majority of what would be needed for the day, could be kept ready and waiting for the scheduled customers!
ShadowBobX
1
Mar 12, 2019
RubyDreamerThis is called micro center... the two near me have basically any mainstream part you can dream of, and the employees always come up to you and help you out, which is nice because while I have done my fair share of pc builds for myself and my family, I too make mistakes. They point out that you accidentally grabbed a k series CPU but your motherboard cannot overclock it, or that you likely have a bottleneck (insert PC part). Don’t quote me on this, but I am like 70% sure that they will even build it for you if you want(for a price ofc). This would make sense as IK they can install upgrades and repairs. As for your other points about buying back used parts, Ik they have places like that, just not where I live.
(Edited)
Quarnozian
51
Mar 1, 2019
https://pcpartpicker.com/guide/ <- pcpartpicker has a bunch of recommended builds in different budgets. There's a slider in the filters where you can set a budget range, but there's not so many options as to overwhelm people new to building.
It's a good starting point for just about anyone, as once you choose a build you can still change any parts you wish to suit your preferences.
QuarnozianYeah this is absolutely a great place to start!

ladder
0
Jan 23, 2019
What is your suggested budget GPU + CPU combo? My current PC has an i7-8700K with a GTX 960, and I feel that I can downgrade my CPU and upgrade my CPU and still maintain good, if not better performance. Thanks in advance!
ladderWhy would you want to downgrade? Just out of curiosity!
You could certainly go down a bit with the processor to an i5, but by the time you sold your 8700k used you'd just have enough to buy an i5, and that would be a bit pointless I think! With the 1660 cards out, you can really get a decent card at a very decent price!

DarkKratoz
50
Nov 12, 2018
RasseruBuy extra everything. If you think you need a set amount of fittings, buy a few more. If you think you'll need a set amount of tubing, buy double. Make sure you measure everything, especially the rads, because you may run out of space when you mount them.
DarkKratozYeah, extra is very very solid advice. Almost guaranteed you'll need it.

ameyer75
37
Nov 29, 2018
TiresomeToe933You know, I hear using water in place of thermal paste works wonders 😂😂😂

DataGotta have a PC to use all them keyboards with =P
Theroc
2318
Keyboard Club Member
Oct 30, 2018
I'll just add that building your own PC is a very rewarding experience.
It can also be a very frustrating experience. Often both.
You can avoid most of the frustration by taking your time before you spend a penny.
Resist the urge to buy the "best" part; the best is what works and fits with the rest of your build.
Also keep it bare. The fewer parts you need to match, the less issues you'll have.
Anything that is not essential can wait. Save some fun for later on.
ChuckDee
1906
Oct 31, 2018
TherocAnd, I say from experience, it can be a bloody experience also. I used to say that the more blood I sacrificed, the better the build. The cases are a bit less sharp now though, and the space for limb movement a bit more available.
A community member
Feb 26, 2019
Therocagreed - I used to buy over the top gaming PCs until i (finally) built my own and realized that i did not need "fancy" gaming PCs for my needs ..
Showing 23 of 24
PRODUCTS YOU MAY LIKE

Trending Posts in More Community Picks

Graham88
Completely surprised by the lack of blade diversity here on Drop...
I’ve been a collector of Blades since before my teens, and a retailer coming up on 15… or maybe 20 years. Drop has really been kind of an interesting experience for me, because I do occasionally get to see some unusual tech and sometimes EDC items that otherwise I might not have been aware of. And maybe it’s because I have a deep love of cutlery and bladed weapons, but I find myself trolling through the site looking at it what’s available; and it’s just it’s pretty much the same. And the bladed community here is just always confused me.. every single knife is about the same, they’re almost all drop points and although the handle materials change and brands change.. it’s really just the same knife over and over and over again... occasionally you’ll see a tanto or a slight variant; but rarely… and almost never a serrated blade. And I’m just deeply amazed at this diversion of serrated blades. And I’m just surprised there isn’t more of a request for diversity here.... and I...
Mar 12, 2020
JellyDPhoto
Can we get Sony E-Mount or other mirrorless camera options please..
Would be nice to see some Sony E mount full frame cameras on here. I currently shoot with a A99 and they killed the lense path for better or more option lenses and now is all E-Mount. 🤔
Jan 13, 2020

RayF
There Are Pandas, and Then There Are Pandas.
And this isn't either of them! The Pandas we're talking about here, are watches, not bears. And what got me thinking about them (again) was a link posted this morning by @cm.rook who pointed a few of us to the very attractive (and not terribly priced) Yema "Rallygraph" Panda which, in it's most traditional arrangement, looks like the one on the left, but can also be had in the version on the right: The model on the left is a true Panda, while the model on the right is called a reverse Panda. The reason for that distinction is clear--Panda bears, only come in the first arrangement. Now at this point, everyone should be thinking about the most well-know Panda, The Rolex Panda, which is actually a Daytona, and among Rolex Daytonas, the most famous of which is the Paul Newman Daytona, which was famous first, because it was Paul's, and second because it sold at auction for $17.8 million (US Dollars). The story of that auction is well-known so I'll only...
Nov 8, 2019
Drop Refurbished
Like-new products you can trustDrop Rewards
Get $5 for every 500 points you earn! Learn more
Drop Keyboard Club
Become a member and expand your keycap collectionCollaborate With Us
For Brands & DesignersFollow Drop
Introduction Laying out how to build a PC from start to finish, for someone that has never done it before is a rather daunting task. In this guide I will try to lay out all of the fundamental knowledge you'll need to build your own gaming computer. That being said, there is no way this is a comprehensive guide, and I'll tell you right now that putting in the effort to do your own research will be key to a successful first build!
To help you with that extra research I'll be providing lots of additional links and resources. Don't rush and take time to really read, learn, and digest as much of the information that is out there as possible.
For now, the scope of this guide is going to just cover the basics, so we will skip over things like overclocking, custom cooling loops, and super specialized enthusiast builds/products. The purpose of this article is NOT to tell you what to buy, it's more about the theory and process behind building a PC, and knowing what you should be thinking about along the way. I'll inject some of my own personal preferences into the mix but make sure to clearly label them.
Ready to begin?
Getting Started: Critical Resources First off, there is one resource that I would consider to be absolutely critical for doing any kind of PC build:
- PCPartPicker: https://pcpartpicker.com/ (My last build as an example: https://pcpartpicker.com/b/9J29TW)
- UserBenchmark: https://www.userbenchmark.com/
PCPartPicker is the builders hub. You'll be able to see if your parts are compatible, search for parts from a very complete database, and find the best prices on parts . As a beginner, just being able to see if your parts are compatible is a huge help. You can also easily see benchmarks, what parts are being used the most, see plenty of pictures of parts you may be considering, and more! Just looking through all of the completed builds for inspiration is a great place to begin.Outside of simple compatibility, you'll also want to start thinking about how well your parts will work together and what may bottleneck your system. Knowing these facts can help you save big on upgrades down the road and allow you to plan for strategic upgrades that will give you the best bang for your buck and eventually get you the performance you want all while allowing you to have a working PC now.
Definition of Common Acronyms and Phrases
- CPU - Central Processing Unit, commonly referred to as a "processor"
- GPU - Graphics Processing Unit, commonly referred to as a "graphics card"
- FPS - Frames per second, not to be confused with "first person shooter" in this guide
- Mobo - Short for Motherboard
- PSU - Power Supply Unit, commonly referred to as a "power supply"
- RAM - Random Access Memory
- HDD - Hard Disk Drive
- SSD - Solid State Drive
- OS - Operating System. Windows, Linux, Mac are the most common. For this guide OS will exclusively refer to Windows based systems.
- Bottleneck - when the capacity or capability of your computer is limited by a single component
Step 1: Starting To Plan Your Build The first step to building as PC is always the planning stage, and this is by far the most critical stage. I would never recommend you start buying critical parts before you have the majority of your build already picked out. Things to really consider when doing a build:- Budget
- What games will you be playing, and what overall performance do you want to see? By this I mean a combination what resolution (1080p, 2k, 4k) and how many FPS (frames per second) you want to aim for. If you want something outside of your budget, design a computer ready for upgrades in the future!
- Are there any other intense applications you may want to use outside of gaming? For example video or audio editing?
Pairing a CPU, GPU, and Monitor to get the end result you want is critical. If you have a 1080p monitor with a 60hz refresh rate and you don't plan on upgrading to a monitor that does 2k/4k or has a 144hz refresh rate it would be huge overkill to throw in a GTX 1080 Ti. On the flip side if 4k gaming is what you are doing a build to see, putting in a GTX 1060 or i3 processor just won't cut it.LSB's Preferences
For me refresh rate, or frames per second, matters much more than resolution. I play first person shooter games pretty much exclusively (Rainbow Six Siege, Battlefield), so I'm not as concerned with seeing the world around me in 4k as much as I am having the smoothest in-game experience. If I spent more time in RPG games like Skyrim or Witcher, I'd probably swing my preference to 4k at lower framerates.
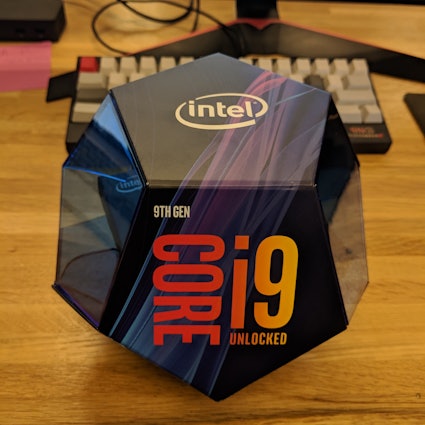
Step 2: Picking A CPU
- AMD vs. Intel: https://www.digitaltrends.com/computing/amd-vs-intel/
Knowing what processor you want from the start is important for a few reasons. First, this will determine what motherboards will be compatible (thus determining compatibility for many other parts). Secondly, you'll have a good baseline for the overall performance of your computer. Just keep in mind that there is no right or wrong choice here, both platforms can give you a fantastic gaming experience.LSB's Preferences
When it comes to CPU's, it generally isn't too expensive to jump tiers. For example, going from an Intel i5 to i7 is only ~$100. In comparison jumping GPU tiers, for example from a GTX 1060 to GTX 1070, is closer to ~$200. So, when it comes to picking a processor I think there is a lot of room for strategic planning, and in this case it's quite viable to go small at first and plan to upgrade in the future, or to just go large (maybe even more than you need) at first and not have to worry about the CPU being a bottleneck as you plan or upgrade the rest of your system.
That being said, I have my degree in Audio Engineering and the vast majority of computers running Pro Tools based DAWs that I used were using AMD processors as they are generally better at multitasking. Just goes to show that each platform does certain things better than others.
Step 2: Picking A GPU
- Best GPU in 2018: https://www.eurogamer.net/articles/digitalfoundry-2018-10-26-best-graphics-cards-2018-7001
First, lets just go over a simple detail that I found to be very confusing at first. If you search for a popular graphics card, lets use the GTX 1080 as an example, you'll be presented with a plethora of different cards from different manufacturers. For the most part, all of the cards perform very much in the same ballpark when it comes to in-game performance. Really what you are looking for when trying to decide on a GPU comes down to other features, such as lighting options, fan noise, cooling style, overclocking capabilities (for advanced users), and so forth. Here is a good comparison chart just showing the small differences between the massive number of GTX 1080's on the market:- https://gpunerd.com/guides/best-gtx-1080-brand
When picking a card the most important selection is what type of card you want, not necessarily the brand of the card. Once you find a card that will provide the overall performance you want, you can then start to dig into the small differences between cards and find the ideal card for your build.Again, there are two distinct families to choose from, NVIDIA and AMD. While AMD does provide some great options for budget and 60FPS gaming, higher end NVIDIA cards are the heavy hitters and can provide the best performance of anything on the market without question, for a price of course.
LSB's Preferences
Even though my last build is showing off the brand new RTX 2080, I'd have to still have to say that the best bang for buck uber-performance graphics card is going to be the 1080 Ti. The 2080 has all new architecture and technology, but some of the exciting features like ray tracing are still widely unproven and unsupported by games. It won't really be until the end of the year that we get good data on how the card really performs when being utilized to it's fullest extent. In the meantime, for current games, the 1080 Ti is right on par with the 2080 and cost significantly less, and will surely still perform well with games for years to come.
And, now with NVLINK taking over from SLI, it will finally be viable to add a second RTX card in the future, so for me planning ahead, if the RTX series really does impress me with its ray tracing capabilities I'll simply add another 2080 in a year or two .
Step 3: Picking Other Internals (Motherboard, PSU, RAM, Storage)
Motherboard: When picking out a motherboard the single most critical detail is making sure that it is compatible with your CPU. Additional details like size will determine what cases are compatible and how many expansion slots for PCI cards and RAM you will have available. If you do plan to overclock, making sure you have a capable motherboard with a good BIOS will be key as well. Other features like having onboard WIFI, good sound outputs, RGB lighting are features worth considering.
For starters, it has to be compatible with your Motherboard. DDR3 and DDR4 RAM are NOT compatible for example, so make sure you know what type of RAM your motherboard requires (if it is a newer motherboard it will almost certainly use DDR4).
Next are stick sizes. Common sizes for desktop RAM sticks are 4GB, 8GB, and 16GB. It is best practice to use only the same sticks in ANY slots you plan to fill. For example, don't put 2x 4GB sticks and 2x 8GB sticks into your PC as that isn't guaranteed to work, stick with 4x 4GB or 4x 8GB sticks.
LSB's Preferences
RAM is one of the easiest components to upgrade. All you need to do is turn off and unplug your PC, pop in new RAM sticks, and reboot, simple as that. So if you need to save money initially RAM is a good place to start. I almost always recommend using 8GB sticks if you have 4 slots. You can get by with 8GB of RAM, though 16 is recommended and enough for most games these days, but if you fill out all the slots for a total of 32GB of RAM you'll have plenty of headroom over any game requirements and have a system that will be able to perform tasks like rendering and editing much better.
PSU: One of the most useful features of PCPartPicker in my opinion is it's ability to track the approximate power consumption of your build when you have all of your parts selected. Generally speaking you want to put your PSU in the 25%-80% draw range. Pushing your PSU to be near peak load, or overload it can cause a world of problems, so when in doubt just go with a higher output model.
You'll see options for "Modular" PSU's as well. This means that you can detach some (or all if Fully Modular) of the power cables, allowing you to hook up only the ones you need. The biggest benefit to this is just in cable management and cleanliness of the build.
LSB's Preferences
When it comes to PSU's I don't play around. Very few things can f#ck up a system like a bad PSU, that have the potential to fry everything connected to them costing potentially hundreds of dollars worth of damage. Just flat out avoid those cheap Chinese specials and stick with a brand name PSU with a good warranty and reviews.
Secondly, I'd highly recommend getting as much power as you can to allow for growth in the future. Saving a few bucks now on a model with 200w less power than the next tier up will be far more expensive to replace with what you need in the future if and upgrade becomes necessary. There are places to save money when building a PC, a PSU is not one of them.
Storage: Hard Drives provide all the storage you'll have on your new computer. Everything form your Operating System to games, pictures, and movies will be stored on these drives. All drives are not created equal though, here is a brief description of the different types of drives:
HDD - These are spinning disk drives that offer great bang for buck when it comes to large capacity storage.
SSD - Solid state drives are more expensive per GB than traditional HDD's, but offer exponentially better performance and stability.
LSB's Preferences
I've landed on what I think is a very good, and frankly common practice system for my file storage. I always have a small capacity SSD (60GB or 120GB) that I put just my OS on. This makes for very quick boot times, and is easy to maintain and backup. I then have an additional SSD for my "main games." It would be far too expensive to have the terabytes of storage I need to hold all my games on SSD's, but the load times for games are much quicker on SSD's, so the games I play the most go onto this drive. Finally, I have my "Mass Storage" HDD's. These traditional drives are slower, but let me hold hundreds of games, songs, movies, etc for a relatively low cost. Using this combination of HDD's and SSD's really makes for a cost effective way to get a lot of performance and bang for buck out of your storage.
Step 4: Picking A Case Picking a case obviously rides hugely on aesthetics, but there are a few details that you should consider when selecting a case.
First off, make sure that it works with all of your components, especially your motherboard and radiator if you are using any liquid cooling for your GPU or CPU.
Secondly, make sure that it will provide a decent level of airflow for all of your internal components. Generally you have fans at the front sucking air in, and fans in the back/top blowing air out.
Next, make sure it has room to hold all your storage drives or additional accessories like internal CD Drives that you may want to use. Internal room will also determine cable management.
LSB's Preferences
When I do a build, cable management is almost always at the forefront, with other features falling behind that. Having exposed cables or PSU is not a look I like, so having a solid system for handling cables is hugely important to me. I selected the NZXT H500i for my latest build because it combined great cabled management, clean looks, and the ability to vertically mount a GPU. It also had a glass panel with a single thumb screw for quick access to the front compartment and came in at a very competitive price compared to many other cases.
Assembling the computer is actually not as hard as you may think! Here is a great overview that shows you how to put together all of your components in an order that won't leave you stuck or trying to install parts at a less than ideal time:
- https://www.instructables.com/id/Build-a-Gaming-Computer/
One more small detail, make sure to ground yourself with an anti-static band when handling any parts! This is so cheap/easy and can save you a lot of heartache and time in the long run.At any point during the build if you are not sure what to do next, stop! There is almost certainly a video or written guide available to walk you through the process.
The final step will be installing your OS. After this you'll be ready to hit the battlefield with your new battlestation!
Additional Post Step: Benchmarking Benchmarking is a process that can help stress-test your system, test for performance issues and bottlenecks, and to compare different settings and changes you may have made to your system. You will commonly see benchmarks being used to compare components, but being able to do your own has its own benefits.
I'll use my latest build as an example. I was testing out different fan curves to help optimize my system when under very heavy loads. In my first test (the bottom result) I had a very conservative fan curve that didn't really ramp up until temps got quite high, and in the second test (top result) I had a much more aggressive curve that was kicking fans up much sooner. The results are not insignificant, as there was a ~15 degree Fahrenheit difference in my GPU max temp.
You can test all sorts of and compare all sorts of data points and settings, be it overclocking a certain component(s), or temperatures for different fan curves and positions. Some games (like Rainbow Six Siege) even have built in benchmark tools to see how many FPS you get with your current in-game graphics settings.
Just keep benchmarking in mind, and after you finish your build find some benchmarking software and make sure all of your components are working within their expected ranges, and make sure that nothing is overheating!
Final Thoughts
There is a LOT of data here, and even more that I probably haven't even touched on. The BIGGEST suggestion I can make to anyone wanting to build their first PC is do to your due diligence in researching everything beforehand. Research parts, build guides, benchmarks, and really try to understand what each component does at a high level before spending any money. A PC is usually not a small investment, but with some good planning you can create a great PC that is ready for upgrades in the future to keep it capable of doing exactly what you want out of it.
If this guide was helpful I can make guides in the future to go over more advanced concepts such as overclocking. If you have anything you'd like to see let me know.
If you have any suggestions/corrections/thoughts for this guide, please don't hesitate to let me know in the comments! I will be updating this over time to be more comprehensive, but for now I wanted to get it off the ground and start providing newcomers with resources!
Finally, if you have any specific questions regarding a build feel free to ask them here!
Change Log:
Published 10/30/18
Added Benchmark Section 10/30/18