Click to view our Accessibility Statement or contact us with accessibility-related questions


Showing 1 of 361 conversations about:

LastContinue
164
Sep 17, 2018
bookmark_border
DarkMio
137
Sep 17, 2018
bookmark_border
LastContinueHere's what happens when you open the the case, I was lubing and silencing the stabilizers, figured out that the stabs come pre-lubed.
Valen
42
Dec 17, 2018
bookmark_border
LastContinuewhich header file contains the definition of `led_instruction_t`, `led_instruction_s`?
edit: /tmk_core/protocol/arm_atsam/led_matrix.h
(Edited)
LastContinue
164
Dec 17, 2018
bookmark_border
ValenThere might be a copy in there, but I'd avoid messing with that unless you have some major functionality you'd like to add. If you're just wanting to a key-by-key color config, then keymap.c will get you there. Checkout
https://github.com/LastContinue/qmk_firmware/blob/lc_sandbox/keyboards/massdrop/ctrl/keymaps/lastcontinue/keymap.c#L207
Valen
42
Dec 18, 2018
bookmark_border
LastContinueyeah I am messing up with `keymap.c` only, now I have implemented "activate on press" (but I am unable to do fade out if I want to use `LED_FLAG_USE_ROTATE_PATTERN`)
I'm going to do splashing, wish me all well 😊
Valen
42
Dec 18, 2018
bookmark_border
LastContinuelive on http://github.com/valen214/Massdrop-Ctrl-Keyboard-Splash-LED
I might create a new post talking about this.
(Edited)
LastContinue
164
Dec 20, 2018
bookmark_border
ValenDemo video looks really great! 👏
I'm not very familiar with the format of how you did your repo 😅 , so if I wanted to try this with my own repo, could I just copy and paste this file, or would I need more?
https://github.com/valen214/Massdrop-Ctrl-Keyboard-Ripple-LED/blob/master/keyboards/massdrop/ctrl/keymaps/valen214/keymap.c
Valen
42
Dec 20, 2018
bookmark_border
LastContinueI am wondering if setting `led_instructions` is an over-kill or not, as seems that some functions are provided to set rgb light https://beta.docs.qmk.fm/features/feature_rgblight
LastContinue
164
Dec 20, 2018
bookmark_border
ValenAwesome! I will try this at home tonight!
rgblight question -> you already seem to more about this than I do, but I'll be your guinea pig for anything else you come up with! I have a sneaking suspicion that those wouldn't work with this board as the chipset it uses is pretty unique in terms of QMK, but definitely worth trying! "Good luck" and "great work"!
(Edited)
LastContinue
164
Dec 21, 2018
bookmark_border
ValenSo I got this to work just by copying one of the keymap.c's to my local. I got this error
`error: implicit declaration of function 'uprintf'; did you mean 'dprintf'?`
But I just changed that around and it seemed to work.
The effect is nuts! I'm going to slowly pick over this and document parts as I understand them on my wiki.
Great work 🙇♂️
This is something that would have taken me months of hacking around.
Valen
42
Dec 21, 2018
bookmark_border
LastContinueNice, the 'uprintf' is just for debugging purposes and can be removed safely.
One more important thing, I've come up with a new solution of how to calculate the position of dripple wave (sort the DISTANCE_MAP by distance), which could reduce the complexity of 'matrix_scan_user()' by log scale! I will do it as soon as I get my hands on a computer.
It turns out that the original `matrix_scan_user()` is doing fine in terms of performance (keystrokes * led_numbers + led_numbers ~= 10 * 87 + 87 ~ 1000 number of for iteration), still doesn't take 1 millisecond in 99 iterations, but I would still going for the new approach.
(Edited)
myroblyte
37
Jan 1, 2019
bookmark_border
Valenhey valen, i followed all the instructions from your github post, but whenever i put the whole mdloader_windows.exe thing into cmdprompt, i get this message:
Opening port 'COM3'... Success!
Found MCU: SAMD51J18A
Bootloader version: v2.18Sep 4 2018 16:48:28
Applet file: applet-flash-samd51j18a.bin
Applet Version: 1
Error: Parser: Hex: Invalid start code! (Line 1)
Error: Could not parse file!
Closing port... Success!
idk what do do at this point, im new to all this stuff. appreciate your time.
Valen
42
Jan 1, 2019
bookmark_border
myroblyteyou might try the .hex file instead of .bin
(or vice versa if you were using .bin)
I don't quite understand what do you mean by "put the whole mdloader.exe into cmd", could you show me how did you execute the command?
if you want to follow how I did (like this `./.build/mdloader_windows.exe --first --download massdrop_ctrl_custom.bin --restart`) you should execute the exact same command in the project root folder.
But tbh, if you are not modifying any of the code, running `download_and_install.bat` inside `.build/` folder is good enough (you don't even need to fork the whole project, the .bat file alone is enough)
(Edited)
Valen
42
Jan 1, 2019
bookmark_border
myroblyteI am quite sure you did not try the .bin file, because I checked out the source code of mdloader which gives that same error only with .hex file
but I didn't have problem with .hex file either.
You gave too little information and I could not figure out the cause of you problem from what you gave.
You could try the .bat file, watch the video, or ask more if you stick to CLI.
(Edited)
myroblyte
37
Jan 1, 2019
bookmark_border
Valeni retried with the bin file. this caused me not to be able to type on it and the led's to shut off. i had to load one of my configs onto it, and then it worked again. here is what i typed after changing the directory to the folder i was using.
mdloader_windows.exe --f -D custom.bin --restart
i hit the kb's reset button and it stopped working. thoughts?
when i try the .bat file:
mdloader_windows.exe --first --download download_and_install.bat --restart
i get a message saying the filename must end in .hex or .bin
(Edited)
myroblyte
37
Jan 1, 2019
bookmark_border
Valenyeah i also renamed the files as custom.hex and .bin. i don't get where to double click the .bat file. on github? in cmdprompt? in files? what leads up to that?
(Edited)
myroblyte
37
Jan 1, 2019
bookmark_border
Valensorry, i was confused. when i double click the bat file in files, cmdprompt opens for a second and then closes
LastContinue
164
Jan 2, 2019
bookmark_border
Great Question!
I don't have an ALT myself, and I haven't looked at the spreadsheet that's come from for a while.
The definitive answer for that is to look on the board itself and look at the numbers written on the PCB next to the lights.
Valen
42
Jan 2, 2019
bookmark_border
myroblyte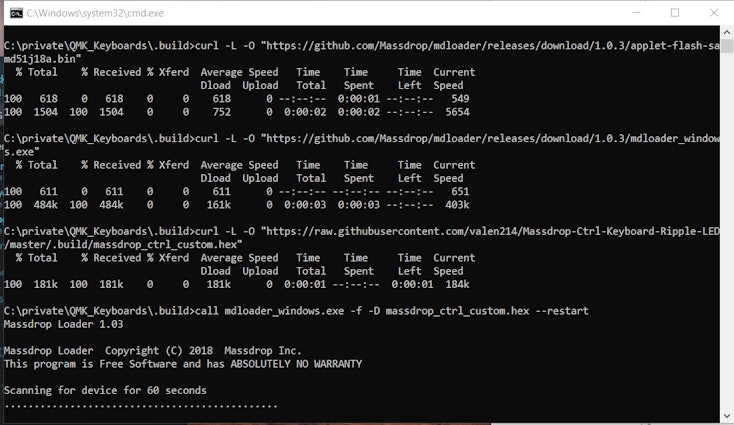
(Edited)
myroblyte
37
Jan 2, 2019
bookmark_border
Valenive kind of given up at this point. thank you for your time. i think someone like me needs a detailed step by step explained tutorial on how exactly to do this, and i would not want to impose on you
Valen
42
Jan 3, 2019
bookmark_border
LastContinuehaha, it toke us much time to figure out that the id2 for underglow is not correct (missing id 88). so the correct value of .id2 should've been 4286578688.
LastContinue
164
Jan 3, 2019
bookmark_border
ValenGlad you got it figured out! It wouldn't surprise me that all of those numbers are wrong.
Valen
42
Jan 10, 2019
bookmark_border
LastContinueSorry to bother you, but may I ask where to obtain such information about led ids?
`./keyboards/massdrop/ctrl/info.json` seems provide some (but I am uncomfortable to use it).
edit: I mean how to relate keycode to led id
(Edited)
LastContinue
164
Jan 10, 2019
bookmark_border
ValenI found it here
https://github.com/LastContinue/qmk_firmware/blob/lc_sandbox/tmk_core/protocol/arm_atsam/led_matrix.h#L125-L128
(referencing my fork, but MD fork will probably have it in that location too)
After that, it was a matter of just setting each .idX = 1,2,3, etc and seeing what happened so I could find the how the lights were laid out on the board.
(and then taking the board apart helped confirm it)
(Edited)
kokozweeb
0
Jan 17, 2019
bookmark_border
DarkMioI was so happy it came aplied with high quality stabs! Now I dont have to buy shitty ones :D
fullCircle801
3
Jan 19, 2019
bookmark_border
ValenHey @Valen I just checked out your repo and I love what you have done. Can you tell me the differences between the custom, custom_activate_on_press, and responsive_pattern keymaps?
I'm also trying to make another layer like FN layer where certain keys change colors when the layer is active but I'm having issues. I tried to mimic what you are doing with "QWEASDP" and "YUIOHJKL" but when my new layer is active the keys I want aren't lit and it just shows your second layer with the blue 5 and stuff. Any ideas would be much appreciated.
(Edited)
Valen
42
Jan 20, 2019
bookmark_border
fullCircle801"custom_activate_on_press" was a initial draft and is no longer maintained.
"custom" is using the implementation that LastContinue introduced (which is modifying "led_instructions"), but this method have several problems, one is that being incompatible with newest QMK firmware, then second one is the same that you are facing. There are some variables that have to be properly set in order for the led instructions to work (because for loop will only iterate to certain point).
As a result, I recommend you to try to have a look on "responsive_pattern", it is compatible with qmk, and more importantly, fairly easy to understand.
Shanoob
0
Jun 2, 2022
bookmark_border
ValenHi Valen,
I just bought a Drop Ctrl keyboard and I came across your amazing github repo and fumbled my way around for hours and managed to get it all working haha
Firstly, thank you! It's so good what you've done to bring to life some additional RGB lighting options to the really lacking stock ones that come with.
I have a quick question (it's probably out of my abilities as I'm not a dev). I see you have currently 6 RGB settings which are great, but I wanted to add an additional one which is just a slight modification of one of your existing ones. I'm assuming the only way to do that is to get stuck into the code?
Anyway, fingers crossed you check these messages. But if not, thanks again for your great work
Related Posts

dovenyi
What is SpaceFN and why you should give it a try
The SpaceFN concept - setting up your space key as a layer switch when held - is probably one of the most useful tweaks in the keyboard hobby. Let me explain how it works. My SpaceFN article on kbd.news made some rounds recently - quite surprisingly given the age of this concept. This piece you're reading is a condensed version of the full post. If you're left with unanswered questions, you'll most likely find the info you're looking for in the original write-up. On my imaginary top list of the most useful keyboard features, tweaks and hacks, SpaceFN would deserve a podium finish for sure. But what makes it so special? In short: SpaceFN is easy to implement, easy to learn, costs nothing, can be used with any keyboard, and can improve your productivity instantly. I will list its benefits below, but can state right at this point that the SpaceFN concept, setting up your space key as a layer switch when held, is clearly one of the most useful tweaks in the keyboard hobby....
Apr 30, 2024

dvorcol
Support for Alternative Layouts
This is a summary of how alternative layouts have been supported by kits such as Colevrak and Homing. It is not a discussion of alt layout performance and development, but if that interests you I highly recommend starting with Pascal Getreuer’s A guide to alt keyboard layouts (why, how, which one?). It’s a concise and comprehensive overview with links to some great sites that go deeper. He also has a separate Links about keyboards page. The Keyboard layouts doc he recommends explains layout goals and metrics in detail, summarizing the alt layouts discussed here as well as more than one hundred others. Sculpted-profile The majority of custom keycap sets are sculpted-profile (Cherry, SA, MT3, KAT, etc. - more on profiles generally here) so let’s start there. Because each row has a unique keycap shape, alt layouts require a unique keycap for each legend that moves off its QWERTY row. At first there were two The Dvorak layout was patented in 1936 by August Dvorak & William L....
Apr 23, 2024

ThereminGoatMK
Do I Need to Lube My Keyboard Switches?
Figure 1: Sometime around here is a good time to ask that question... If you’re new to the mechanical keyboard hobby, I have no doubt that planning your first keyboard build is a bit of a daunting task. To be entirely honest with you, it’s only a tiny bit less daunting for your second or even third keyboard builds should you stay around a little while longer. You’ve got the keyboard itself to worry about, stabilizers, keycaps, and even switches on top of all of the intangible marks you want your dream keyboard to hit. Switches are especially daunting right out of the gate as there’s just so many options out there to pick from – each with their own unique specifications, manufacturers, and more. Yet, in spite of all of these differences between switches, time and time again I find people always asking about lubing switches as one of their chief concerns when it comes to picking some up. With countless numbers of content creators talking about lubing switches, its no...
Apr 17, 2024

HoffmanMyster
DCX vs DCD vs DCL - Drop’s Keycap Profiles Explained
We’ve covered the basics of keycap profiles before—spherical/cylindrical, sculpted/uniform, etc. One thing that has come up more and more over the years as we’ve expanded our portfolio of offerings here at Drop is the distinction between some of our similar profiles. Specifically, what is the actual difference between DCX, DCD, and DCL? Cylindrical Profiles To recap the previous article on the topic, one of the most basic ways to separate various keycap profiles is by shape (cylindrical, spherical, or flat). DCX, DCD, and DCL are all cylindrical profiles. The most famous cylindrical profile is Cherry profile, as defined by the original manufacturer of the keycaps—Cherry. GMK now owns those tools, and as such, only they can technically claim to produce “Cherry” profile keycaps. Similar keycap profiles are often called Cherry profile colloquially, but are in actuality slightly different. For the sake of not splitting hairs, all of the cylindrical profiles discussed here are...
Apr 9, 2024

cobertt
3 or 5? How many pins does your switch really need?
One of the oldest questions, albeit one you don’t see very often anymore, is about 3-pin and 5-pin MX switches. Early in the custom switch scene, budding enthusiasts would need to determine whether their keyboard needs 3-pin or 5-pin switches. Today, the question doesn’t appear as often as it used to, but it is still important to know the difference and when one is a better choice. The difference between these two types of switches is in the name, the number of pins. As seen in the pictures below, 3-pin switches have two metal legs for the contact leaves and registering of switch presses as well as the stem pole. These switches were traditionally called plate mount switches, as they relied on the plate to align the switches on the PCB. 5-pin switches have the same contact pins and stem pole but are also accompanied by two additional alignment pins on the left and right of the stem pole. These were called PCB mount switches, as they could be used without plates as the PCBs would...
Apr 2, 2024

ThereminGoatMK
Mechanical Keyboard Sound Isn't That Simple
Figure 1: I couldn't think of a more literal way to represent this article if I tried... Looking back just a few years ago, there’s no doubt that the huge influx of people that joined the hobby at the peak of the COVID pandemic were drawn to keyboards by way of YouTube, TikTok, and other audio-visual content platforms. Even as the output from these content creators has waned in recent months, their collective impact and legacy on the keyboard hobby is rather firmly etched in the history books. As a result of all of their sound tests, build logs, and opinion videos, the message is clear to any new person joining the hobby: mechanical keyboards are all about the sound. Thock this, clack that. Whether it’s keyboards, keycaps, or even singular switches, seemingly everyone new to the hobby meticulously pores over each component of their keyboard not in an attempt to figure out how it will feel in hand, but how it will sound as they’re furiously grinding their way out from...
Mar 27, 2024
Trending Posts in Mechanical Keyboards

kali.shadowOps
TKD Cycle 7 with MT3 EXTENDED 2048 CUSTOM KEYCAP
I am finally done with my cycle 7 . Switches: KDBFansRoller, Linear 60g, and Kailh Chimp Linear GaimingV2 60g. but I will replace the Kailh with Gazzew U4T V2.
May 3, 2024
NewmanDA9901
LOTR Keyboard with Hardcore keycaps?
Hello. Is there a way to get the DROP + THE LORD OF THE RINGS™ BLACK SPEECH KEYBOARD with only the HARDCORE BASE KIT keys? Without the English letters on it. I really want one but it would be awesome if it came with the hardcore kit installed. Thanks in advance!
May 2, 2024


mabyen
Battlestations
Black Speech keyboard
Looks and feels good and mechanical sound is great!
May 1, 2024
dovenyi
What is SpaceFN and why you should give it a try
The SpaceFN concept - setting up your space key as a layer switch when held - is probably one of the most useful tweaks in the keyboard hobby. Let me explain how it works. My SpaceFN article on kbd.news made some rounds recently - quite surprisingly given the age of this concept. This piece you're reading is a condensed version of the full post. If you're left with unanswered questions, you'll most likely find the info you're looking for in the original write-up. On my imaginary top list of the most useful keyboard features, tweaks and hacks, SpaceFN would deserve a podium finish for sure. But what makes it so special? In short: SpaceFN is easy to implement, easy to learn, costs nothing, can be used with any keyboard, and can improve your productivity instantly. I will list its benefits below, but can state right at this point that the SpaceFN concept, setting up your space key as a layer switch when held, is clearly one of the most useful tweaks in the keyboard hobby....
Apr 30, 2024
Ike4948
Silent Holy Panda X?
I ordered some Holy Panda X switches, and I fell in love with them. They are a joy to type on. There's just one problem. The place that I use my keyboard to type the most is obviously at work, which is a problem if I want to use the Holy Panda X in the office around a whole bunch of people. I really don't want to torture my coworkers with the clack of these switches. I'd rather they still liked me. The good news is that, for me, the actuation of the Holy Panda X is the best part. I could take or leave the sound it makes; even if it is fantastic. Which leads me to my conundrum: is there another "silent" switch that feels similar to the Holy Panda X? Is there a piece I can remove from the Holy Panda X that would allow me to make them silent? Or am I going to have to wait and see if Drop will drop a Silent Holy Panda X for the in-office mech community?
Apr 29, 2024


Drop Refurbished
Like-new products you can trustDrop Rewards
Get $5 for every 500 points you earn! Learn more
Drop Keyboard Club
Become a member and expand your keycap collectionCollaborate With Us
For Brands & DesignersFollow Drop
I originally posted the link to it in another comment, but I don't want that comment to turn into a saga because the instructions for said sheet are long-winded.
Why would you want this?
1. Knowing (roughly) how the online configurator works 2. Having more options available to you than the online configurator provides (such as brightness, and caps key LED control) 3. Probably 100 more ideas I can't think of at the moment.
Disclaimer: This deals with quite a bit of math (albeit painfully simple once grok'ed). However, It's been a long time since my CS days, so there's probably a lot of bugs in there, but so far, "works on my machine"
Here's the sheet: https://docs.google.com/spreadsheets/d/1kiBfnmMFix5_T1oD7WCBvGF-wOoa0wvOVLMAP4B00jI/edit?usp=sharing
The idea (once you copy/download it) is that you put the value of the LED into one of the boxes marked LED Number in either one of the tabs and it'll spit out a value that you can put the source code if you've pulled down the MD QMK fork and want to hack.
Oh I'm assuming you've re-pulled down Massdrop's QMK Fork, because currently that's where the key-by-key layout code is living https://github.com/Massdrop/qmk_firmware/
Also, there are a couple of bugs (that the compiler will point out very quickly and are easy to fix, they are in keymap.c) so build the default before investing too much time. It's a nifty demo, I really like what the FN key does (It's not worth PR'ing because I'm sure this will be fixed and eventually wind up in QMK prime)
This was my target/inspiration https://github.com/Massdrop/qmk_firmware/blob/master/keyboards/massdrop/ctrl/keymaps/default/keymap.c#L209
For making your own version, that you'll need to know the LED values, and the SUM of the 2^x values based on the LED's element mapping in their array
Long winded explanation: Skip if you just want to make maps! Sum? Yes, it's not just a simple leds = {1,2,3,4,5} style setup (boy I wish). It uses this techique called 'bitwise' (based on the comments in the code) that I never fully comprehended in my school days and I only did the bare minimum to re-education myself on today. Basically it's like a parity scheme that lets one number represent several addresses. If you look at the "Map" tab in the spreadsheet, you'll see there are 4 arrays, each of 32 elements. So if you want to just do spacebar, that's LED 80. LED 80 is 16th element in array id2. That means it's value is 2^16 😵😵😵. Want to do Spacebar + Alt? That's (2^16 + 2^15). Yes, a sum.
Back to Action So once you've gotten some LED values jotted down, you can go over to the "Values" tab and use the sheet (plus the ample scratch area) to put together your map. You'll need THE SUM of the binary values (probably incorrect term, but it's been over a decade since my CS studies) to put into the code.
Example: If you want "wasd" to be it's own color, you'll need LED's 36, 52, 52, and 54. Luckily these are all in id1. Using the "Values" tab, you can find out that these are elements 4, 20, 21, and 22 in id1. You can then pick any cell (although there's a "sum" cell as a "for instance", but really any will do) , start a `=sum(` function, and then click the values that correspond with elements 4,20,21,22. That will make 7340048.
Take that number and put it into a block of code like https://github.com/Massdrop/qmk_firmware/blob/master/keyboards/massdrop/ctrl/keymaps/default/keymap.c#L209 with `.id1 = 7340048` as the address and you're ready to go. (If you want all of the other keys besides WASD, you can take (4294967295 - 7340048) which will give you 4287627247. Of course, that's only for id1. You'll need to do calculations for all of the other idX arrays)
Helpful snippets:
`.id2 = 4278190080, .id3 = 1073741823`
That's the entire underglow layer.
`.id0 = 4294967295, .id1 = 4294967295, .id2 = 16777215,`
That's all of the key leds.
`.id0 = 4294967295, .id1 = 4294967295, .id2 = 4294967295, .id3 = 4294967295`
That's EVERYTHING.
Edit: I fixed my repo enough to post the changed I made yesterday using the spreadsheet. https://github.com/LastContinue/qmk_firmware/blob/massdrop/keyboards/massdrop/ctrl/keymaps/lastcontinue/keymap.c#L217
Pulling the entire branch and then compiling the `lastcontinue` map will give you a pretty neat color scheme (I think).
(And again, if you don't want to use two keyboards to program this board, let alone two different commands, check out my helper script https://gist.github.com/LastContinue/ad5a526033e8965563e407d8f0b1b09e)