Click to view our Accessibility Statement or contact us with accessibility-related questions


Showing 1 of 264 conversations about:

theimmc
872
Oct 11, 2015
bookmark_border
kravlin
79
Oct 12, 2015
bookmark_border
theimmcI'm interested in not blowing my teensy on on this project. Do you have a suggestion on a supplier you know is good?
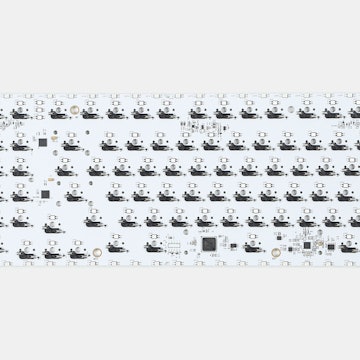
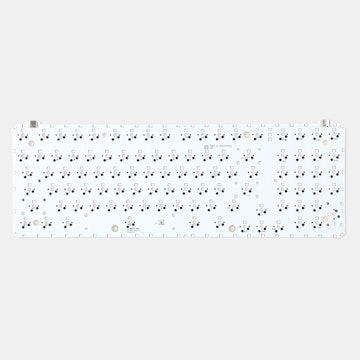
And yeah, I'm not gonna rail too much on NPKC, they got pushed into making a PCB, and it's not a great one, but on the other hand, they weren't even sure they'd have it ready for this drop. So we kinda forced this on ourselves by pushing them to build a PCB really quickly. You push people to put something out, they put something out. it's very much an unfinished product, but, it does everything they said (it's a numpad). fast, cheap, good, choose two :P
That being said. I'm very interested in wiring up my own tester now and getting moving ahead building something neat I can use.
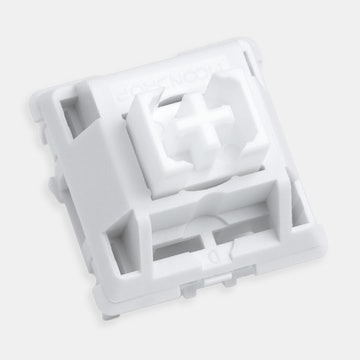
Also, as a heads up for anyone who does decide to use the PCB. Unsoldering the switches is a giant pain. A much bigger pain than unsoldering normally is because the lip on the bottom edge makes getting to some places difficult.
I'd do your research and make sure your PCB works, and it's what you want before assembly.
And yeah, I'm not gonna rail too much on NPKC, they got pushed into making a PCB, and it's not a great one, but on the other hand, they weren't even sure they'd have it ready for this drop. So we kinda forced this on ourselves by pushing them to build a PCB really quickly. You push people to put something out, they put something out. it's very much an unfinished product, but, it does everything they said (it's a numpad). fast, cheap, good, choose two :P
That being said. I'm very interested in wiring up my own tester now and getting moving ahead building something neat I can use.
Also, as a heads up for anyone who does decide to use the PCB. Unsoldering the switches is a giant pain. A much bigger pain than unsoldering normally is because the lip on the bottom edge makes getting to some places difficult.
I'd do your research and make sure your PCB works, and it's what you want before assembly.
Zone
41
Oct 12, 2015
bookmark_border
kravlinI honestly want to know if this PCB can be REPROGRAMMED before I solder on it.
Other people have said that it is REALLY slow.
I don't think NPKC tested the PCB at all. Also seeing that they kept pushing back production on the tester plate itself, I bet they don't have enough employees to really be in a production business.
theimmc
872
Oct 13, 2015
bookmark_border
kravlinIf you're not in a hurry, get a Pro Micro clone from AliExpress. About $3 each. I got mine from Great Wall electronics, and it seems to ship from Malaysia, and took about 3 weeks to arrive. I got some from eBay some time back, and shipping took only a week from China, but I'm not sure if that's just luck. They also cost a bit more.
A0.C
394
Oct 14, 2015
bookmark_border
ZoneThe chip is programmable. No known projects using these for a keyboard. There is a free version of Microchip's C compiler, but you need a hardware programmer to be able to flash it. So even if someone does create usable firmware for it, you would need a PIC programmer to actually flash the chip. https://www.sparkfun.com/categories/6
Was going to look into it, since it seems the Infinity backers are getting these PCB's, but probably not worth it.
Was going to look into it, since it seems the Infinity backers are getting these PCB's, but probably not worth it.
theimmc
872
Oct 14, 2015
bookmark_border
A0.CThe programming pins look like they are exposed on the USB connector. The PICkit3 looks like it supports the PIC18F series, but requires a cable, and I don't see it for sale anywhere. It's a fair amount of work to trace the circuit, write a firmware, spend $50 + build a cable, just to reprogram a $9 board. And you still won't get NKRO,
And all the other people with the board would need to pay to have the board shipped 2 ways, or buy a programmer for $50+, for a $9 board.
I think it'll be a great learning experience, but other than that it doesn't make sense. Unless someone works with these as their day job. Anyone?
And all the other people with the board would need to pay to have the board shipped 2 ways, or buy a programmer for $50+, for a $9 board.
I think it'll be a great learning experience, but other than that it doesn't make sense. Unless someone works with these as their day job. Anyone?
Swifty570
0
Oct 19, 2015
bookmark_border
theimmcI had pre bought a pro micro, but no idea on how to make it work, and good tuts that you know of?
theimmc
872
Oct 19, 2015
bookmark_border
Swifty570I don't think this discussion is the ideal medium for this. Can you PM me on reddit (same username as this) and tell me how much experience you have working on Arduino? Don't be shy if you have no experience, I have links - but if you have some experience, I'll skip over the intro level stuff to avoid wasting your time.
Zone
41
Oct 21, 2015
bookmark_border
theimmcthis might actually be a good place for this discussion.
this switch tester has a fairly large following on other pages - and I think it is because a programmable numpad for macros / custom stuff is going to be a thing
Question.. is the pro micro easier to program than the teensy? The teensy's capabilities are not matched by online documentation. You already have to be familiar with programming in C to get full use of it.
Question.. is the pro micro easier to program than the teensy? The teensy's capabilities are not matched by online documentation. You already have to be familiar with programming in C to get full use of it.
theimmc
872
Oct 21, 2015
bookmark_border
ZoneBoth the Teensy and the Pro Micro can both be programmed either with the Arduino IDE or with avrdude. But no matter what you do, the programming language is C (actually, C++, but it's mostly C). The main advantage of the Pro Micro over the Teensy is that you can get a Pro Micro clone for about $3, while a Teensy will set you back about $20. I've written code for keypads that I don't mind sharing - in fact, here's one that I wrote for my Cooler Master switch tester. It can be extended to handle 17 keys fairly easily, but I need to verify if it can send numeric keypad codes and handle the num lock status LED. I've verified them separately but never in one complete project.
https://github.com/theimmc/six-key-pad
http://forum.arduino.cc/index.php?topic=173583.0
Zone
41
Oct 22, 2015
bookmark_border
theimmcDude.. thanks for sharing.
For my first project with this, I started programming my CMSTORM 6 key tester earlier this week [HAHA Irony]. My goal is to extend what I learn to the 17 key switch tester, then later to possible larger projects.
I looked at your code... is it a matrix? I'm not familiar with the way you set it up.
But your code has exciting stuff (for me) like the double array thing key_code and shift_status to monitor the modifier.
[edit - I read the code... and I figured out that you're using pullups instead of a matrix]
[edit - I read the code... and I figured out that you're using pullups instead of a matrix]
theimmc
872
Oct 22, 2015
bookmark_border
ZoneThere's no need to make a matrix with a 6 key tester :) Without a matrix you use 6 I/O pins. With a matrix you use 5 (2 rows + 3 columns). Hardly worth the effort. If you don't do a matrix, you don't need diodes. I wrote that for my 6 key CM tester, actually.
Zone
41
Oct 22, 2015
bookmark_border
theimmcThere's two reasons I'm doing a matrix:
1. I want to learn the matrix code more than I want to learn pullup code. Pullup code looks so easy that if I need it, it will be much easier to learn.
2. Like you thought of with wasd vs arrows, I am going to use layers, with multiple LED's for status and function choice.
theimmc
872
Oct 22, 2015
bookmark_border
ZoneTrue, but as you can see from my code, matrix code is not really that much more complicated. Instead of hooking the rows to ground, you hook them to an output pin, and alternately set each row to ground.
theimmc
872
Oct 24, 2015
bookmark_border
ZoneI use Keyboard.press() - the Arduino IDE does some strange remapping of the codes though. For example, num lock is 0xDB.
Anyway, I've finished soldering my numpad in a matrix layout, wrote and tested the code. It's for a Pro Micro, so if you want to use it for a Teensy, you'll need to modify it.
https://github.com/theimmc/numeric-keypad
The soldering could have been neater. I should have planned it out first before starting to solder.
hotshot618
16
Oct 24, 2015
bookmark_border
theimmcThat looks great, thanks for sharing the coding bit. I was planning on doing this as well but know very little about code.
theimmc
872
Oct 25, 2015
bookmark_border
hotshot618Thanks. I posted this on reddit with more detailed instructions. I tried to make the code as straightforward as possible, but if you need clarification, feel free to ask.
https://www.reddit.com/r/MechanicalKeyboards/comments/3q41gn/photos_npkc_numeric_keypad_build_instructions/
https://www.reddit.com/r/MechanicalKeyboards/comments/3q41gn/photos_npkc_numeric_keypad_build_instructions/
Zone
41
Oct 26, 2015
bookmark_border
theimmcWhile I've been waiting for my LEDS to come in, I've been trying to figure out how to send two bytes at the same time, because that's how Windows media keys work.
Like the strange 0xDB for numlock you discovered.
I know andruino code can do it.... for example, LEFT_GUI is 0xE05B and RIGHT_GUI is 0xE05C (that's what they are in the operating system).
I have no idea how Keyboard.write() actually sends them.
theimmc
872
Oct 26, 2015
bookmark_border
ZoneKeyboard.write() actually calls Keyboard.press() followed immediately by Keyboard.release(). Adding multimedia keys support is more complicated than that, you need to modify some source code distributed with Arduino. Specifically, you need to extend the USB Descriptor table. This article describes what you need to do, and how to do it : http://stefanjones.ca/blog/arduino-leonardo-remote-multimedia-keys/
Zone
41
Oct 27, 2015
bookmark_border
theimmcyour knowledge is intense.
I figured it was some background file that holds the program's actual HID commands
[edit] - remote buttons are different than the keyboard media buttons.
[edit2] - from what you showed me, I searched and found this: https://github.com/benblazak/ergodox-firmware/blob/master/src/lib-other/pjrc/usb_keyboard/usb_keyboard.h
[edit2] - from what you showed me, I searched and found this: https://github.com/benblazak/ergodox-firmware/blob/master/src/lib-other/pjrc/usb_keyboard/usb_keyboard.h
theimmc
872
Oct 27, 2015
bookmark_border
ZoneThere's still a lot I don't understand. There doesn't appear to be a way to do it without modifying the Arduino libraries, but it is very possible I'm wrong.
Zone
41
Oct 27, 2015
bookmark_border
theimmcyeah... I just have no clue which files and what to do.
They figured out what files with the ergodox keyboard. Right now I'm trying to figure out how to implement this in the andruino libraries. If I'm good enough what little I know, that is
https://github.com/benblazak/ergodox-firmware/blob/master/src/lib-other/pjrc/usb_keyboard/usb_keyboard.h
[EDIT]
Yeah so... apparently why my ducky keyboard can do this is because it appears to the OS as more than one kind of thing... and the "consumer control device" driver is the one that handles these commands.
Just FYI for anyone that stumbles on this page
Zone
41
Nov 14, 2015
bookmark_border
theimmcHere is an update on my progress.
I am trying a Teensy 3.2 because the community has a little bit more development in the keyboard library vs the Teensy 2.0 or the Pro Micro.
A disadvantage is that the keycodes theimmc figured out for numpad keys are different.
I did figure them out, however.
NOTE: This was written for Teensyduino 1.25 with Arduino 1.6.3. I updated to Teensyduino 1.26 and Arduino 1.6.6, and it DID NOT WORK. However, Teensy's keyboard library was TESTED WORKING when I used Teensyduino 1.25 with Arduino 1.6.5-r5.
Something I found out abut the Teensy 3.x versions: The pins output 3.3 volts instead of 5v. Because of this, I had to buy some 100 ohm resisters for the led's (I know I needed less resistance, but I am overly protective of my LEDs. In 5v circuits I use 470 or 500 ohms).
The matrix: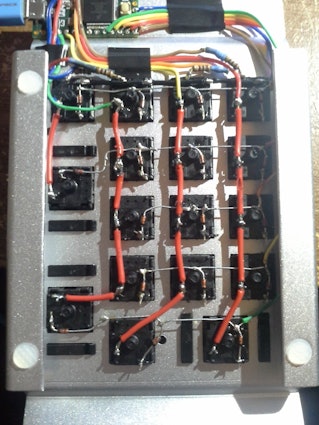
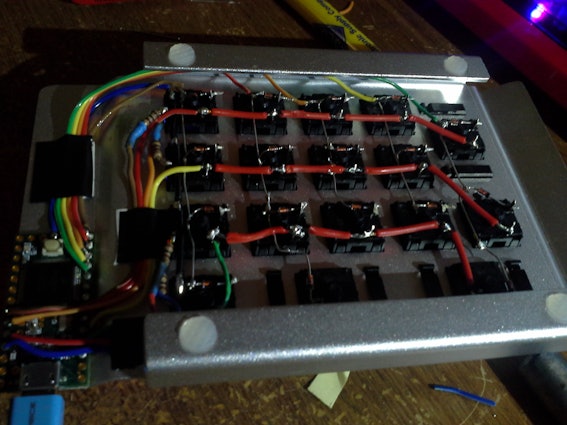

Testing the four status LED's:
Layer 0 is numpad keys: This is useful for gaming because games can bind separate commands to numpad_1 and regular 1, for example. Layer 1 is regular keys: This is useful for using a number pad-like device on a laptop where you can't turn numlock on, as numlock on a laptop messes up the letters or other keys.
How to change layers: Hold top left button (button 0 in the code), then press slash (button 1) BOTH LAYERS HAVE BEEN TESTED IN WINDOWS AND LINUX
Tested using: http://www.keyboardtester.com/tester.html
I recommend using osk.exe (included with Windows) and "Onboard" for linux. These are virtual keyboards. You need these for pressing... or unpressing a key while you are debugging.
I also recommend looking at @theimmc's code which is linked on page 27. I learned half of what I know in arduino C from reading his code.
NOTE: This was written for Teensyduino 1.25 with Arduino 1.6.3. I updated to Teensyduino 1.26 and Arduino 1.6.6, and it DID NOT WORK. However, Teensy's keyboard library was TESTED WORKING when I used Teensyduino 1.25 with Arduino 1.6.5-r5.
Something I found out abut the Teensy 3.x versions: The pins output 3.3 volts instead of 5v. Because of this, I had to buy some 100 ohm resisters for the led's (I know I needed less resistance, but I am overly protective of my LEDs. In 5v circuits I use 470 or 500 ohms).
The matrix:
Testing the four status LED's:
Layer 0 is numpad keys: This is useful for gaming because games can bind separate commands to numpad_1 and regular 1, for example. Layer 1 is regular keys: This is useful for using a number pad-like device on a laptop where you can't turn numlock on, as numlock on a laptop messes up the letters or other keys.
How to change layers: Hold top left button (button 0 in the code), then press slash (button 1) BOTH LAYERS HAVE BEEN TESTED IN WINDOWS AND LINUX
Tested using: http://www.keyboardtester.com/tester.html
I recommend using osk.exe (included with Windows) and "Onboard" for linux. These are virtual keyboards. You need these for pressing... or unpressing a key while you are debugging.
I also recommend looking at @theimmc's code which is linked on page 27. I learned half of what I know in arduino C from reading his code.
theimmc
872
Nov 16, 2015
bookmark_border
ZoneThanks for sharing! Especially nice to see it with the Teensy 3.2. And that soldering job puts mine to shame...
Question : where's the class Keypad defined? Is this in Arduino IDE 1.6.6?
Question : where's the class Keypad defined? Is this in Arduino IDE 1.6.6?
Zone
41
Nov 16, 2015
bookmark_border
theimmcI am using Arduino IDE 1.6.3.
The Teensy library installer doesn't support the newer ones because of glitches, they say.
FYI This is my first attempt at cutting away insulation on a wire in the middle. I saw it on reddit I think. Stranded wire is a pain. I have stuff I was needing to get from adafruit.com... I just made a purchase after making this keyboard, I also got some solid core wire to use in the future.
FYI This is my first attempt at cutting away insulation on a wire in the middle. I saw it on reddit I think. Stranded wire is a pain. I have stuff I was needing to get from adafruit.com... I just made a purchase after making this keyboard, I also got some solid core wire to use in the future.
theimmc
872
Nov 17, 2015
bookmark_border
ZoneI used 1.6.5 for mine.
Yeah, stranded wire is a pain. The 6 pack of 22 AWG solid core from Adafruit looks useful. I used a roll of 22 AWG solid core black wire I had instead. To make life a little easier in the future, I picked up another roll of red.
I used a pair of flush cutters to notch the insulation and slide it to expose the conductor instead of using an Xacto to cut away the insulation. Seems like it might be easier this way if you get the measurements correct.
Related Products

Drop Refurbished
Like-new products you can trustDrop Rewards
Get $5 for every 500 points you earn! Learn more
Drop Keyboard Club
Become a member and expand your keycap collectionCollaborate With Us
For Brands & DesignersFollow Drop
By the way, the plate (and a different collection of switches) is availabe on eBay for $25.30 shipped (current price - when I bought it, it was $24). Transparent 1U keycaps are included, in different profiles (so the curve is correct). Note that this means the 0, + and ENTER keys do not have the 2U wide keys. It does not have the NPKC logo on the top - it's completely plain. The only (maybe) shady part about this auction is that the seller is using some photos from Massdrop. Maybe he has permission...